You've seen them pop up all over the internet - from Pinterest to Instagram and beyond. But when you look at retailers that sell them, you're shocked at the ticket prices. Beaded chandeliers are the hot new home decor item for kitchens, dining rooms and bedrooms, but are often hundreds of dollars to purchase. With just a few simple supplies and lots of love, why not make your own for just a fraction of the cost?! Check out my Beaded Chandelier Tutorial below, made for UNDER $100!
Remember that time I started making a beaded chandelier for the girls' room? Ya, that seems like ages ago, doesn't it? Truth be told, it was almost a full year ago in early spring 2020.
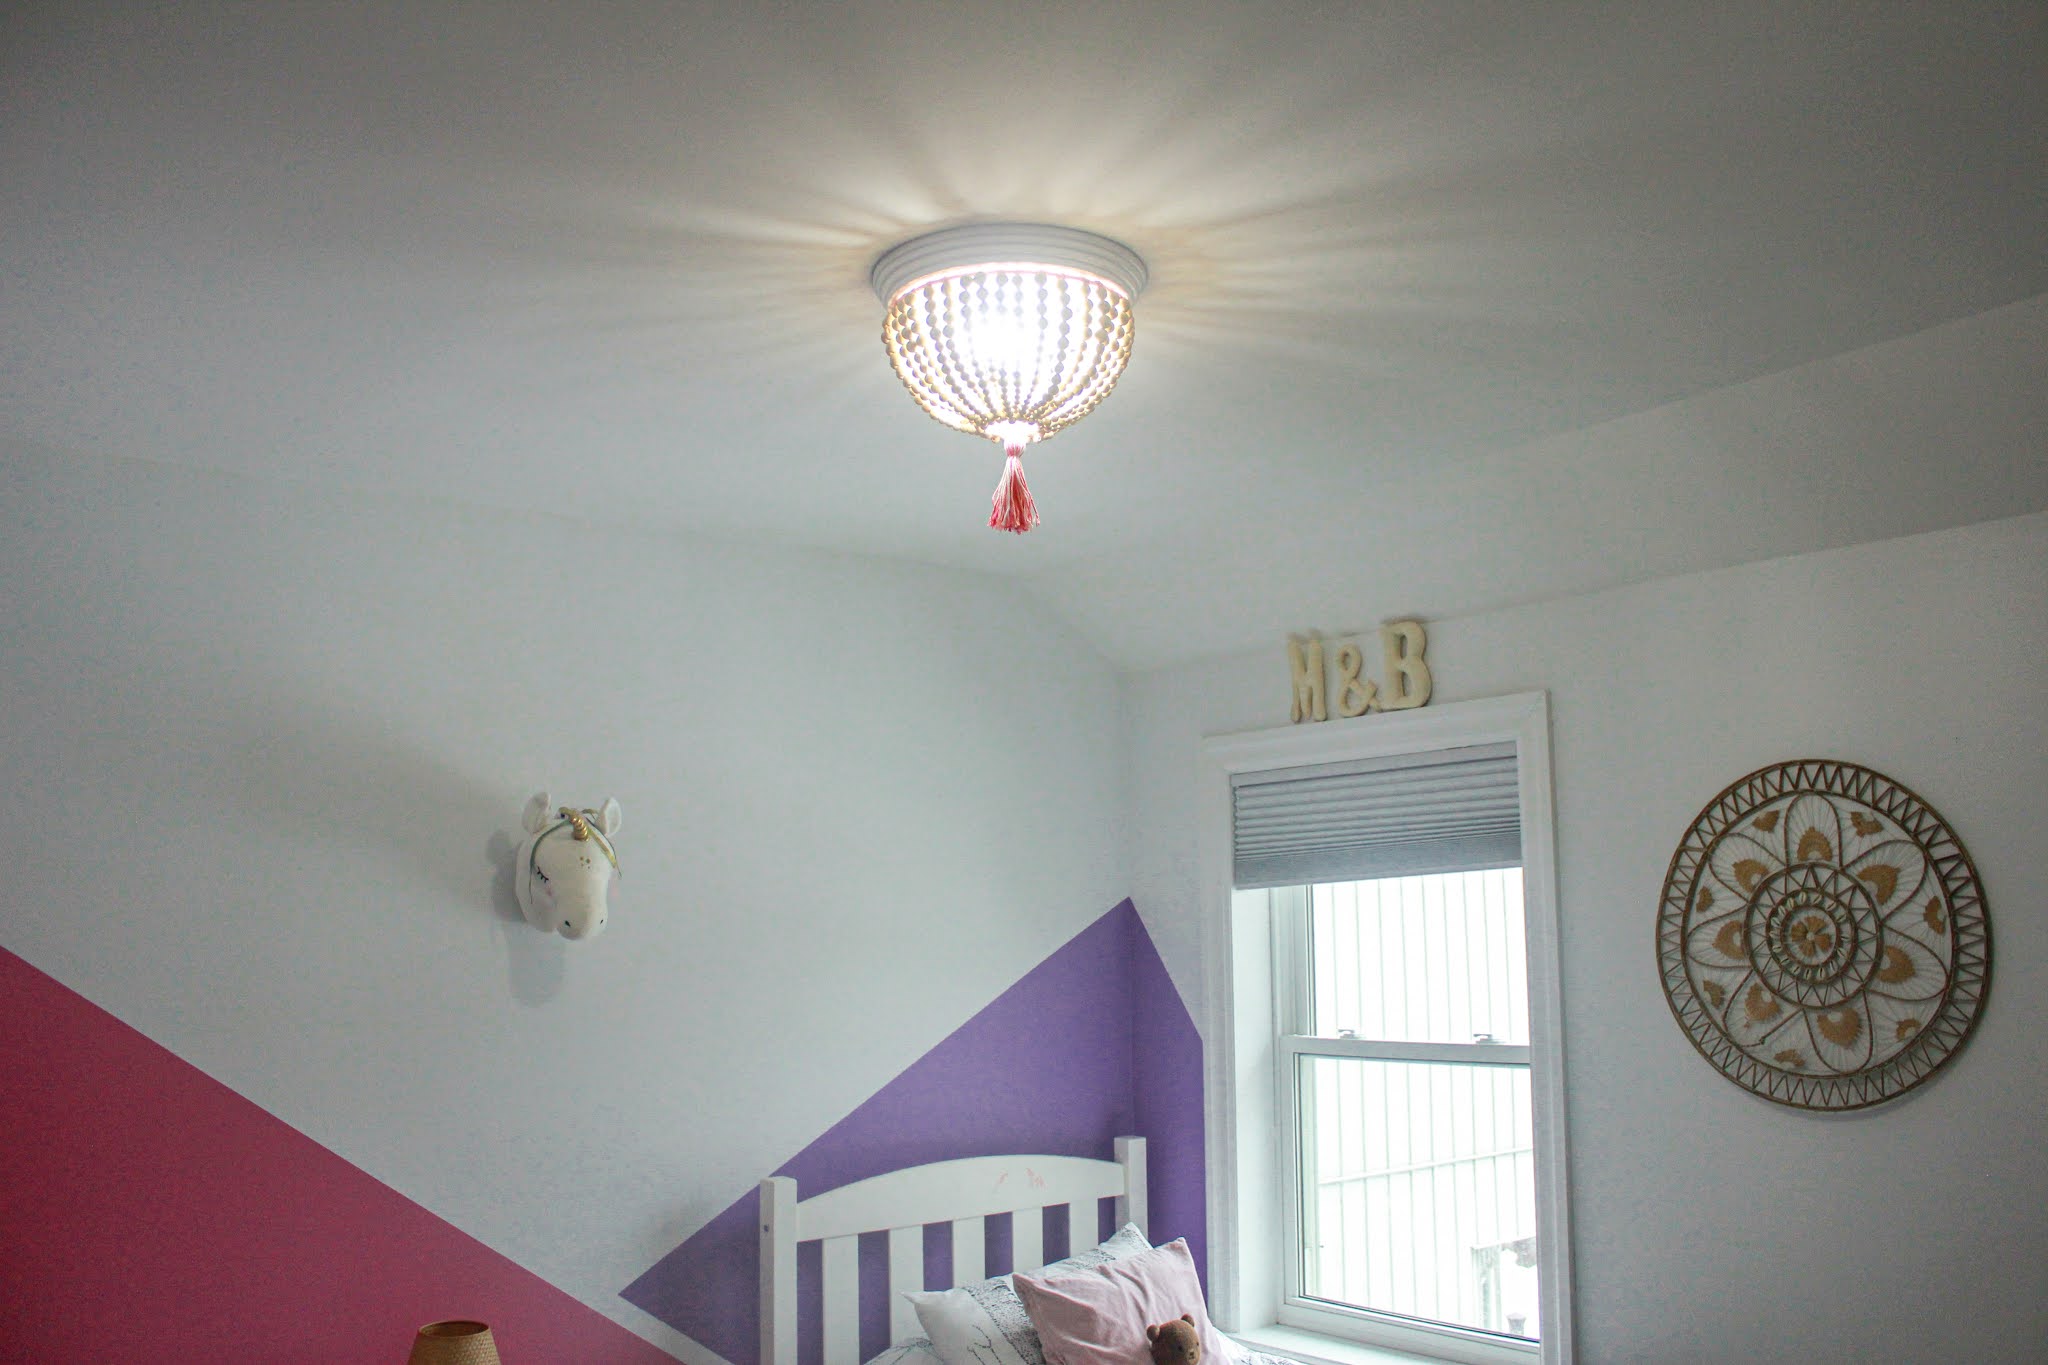
Fast forward to winter 2021, and I can officially tell you... it is COMPLETE! And I'm obsessed.
But before I get into how I made it, let's rewind back to the spring when I started designing the girls' room. Knowing I wanted to switch out the existing industrial-looking flushmount light for something a little more fun, I fell in love with the beaded chandeliers I was seeing on Pinterest. But what I didn't love, was the price tags that came along with them. $150? $200? $200+? No thanks.
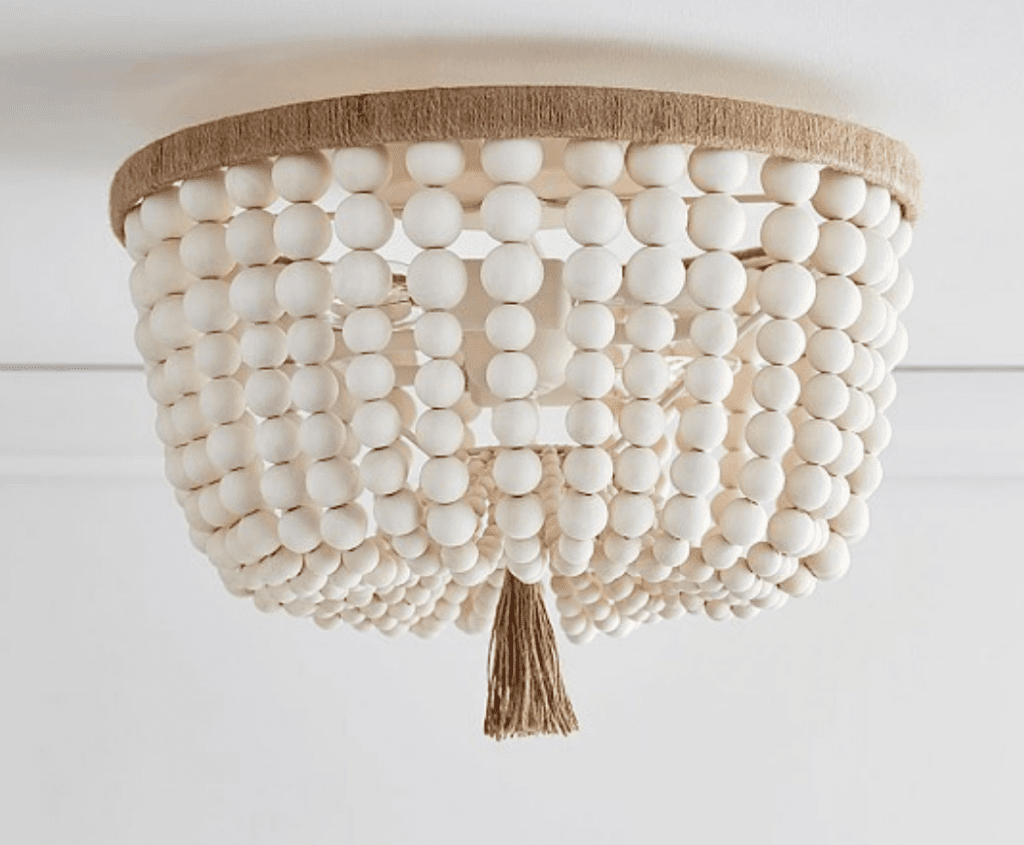
And then, I came across the photo below and just KNEW I could make that. For a lot less.
And while it may have taken me 7 months fully complete and install, I did end up making it for a lot less. I also made one that was a lot more personalized to the style of my girls' room. (In reality, it only took a month to make, chipping away little by little each day when I had some free time - aka nap time - BUT it took 6 more months of install because of some technical difficulties. And by technical difficulties, meaning me not doing it right the first time. See why below in 'Lessons Learned'.)
Read on to learn how I made this beaded chandelier for under $100, and how YOU can too!
Beaded Chandelier Tutorial
Materials
- Wire hanging basket
- Spray paint (white, or colour of choice)
- Fishing line
- Scissors
- 2 bags of Wooden beads (700 pieces, 4 sizes) *see number of beads used below
- Yarn, colour(s) of choice
- Hot glue and glue gun
- Acrylic paint (white, or colour of choice)
- Small art paint brush
- *Associated tools for disconnecting and reinstalling existing light
Directions
Creating the Beaded Chandelier
1. // Measure the base of your existing flushmount light to know what size of wire hanging basket you are looking for.
2. // Once you have found your basket, spray paint it your colour of choice. I used Rust-Oleum Painter's Touch 340g Ultra Cover Spray Paint (Paint + Primer) in white - good for metal. You may need more than one coat to ensure that you get in all of the spots. Allow to dry.
3. // Using the fishing line, measure the length you need to go from the wide end (top) of the basket to the bottom. Add a few extra inches for tying.
4. // Knowing the length of fishing line and size of beads, determine your bead pattern. The pattern I chose was (from top to bottom) 4x large (20mm), 5x medium (16mm) and 6x small (12mm).
5. // Tie one end of the fishing line to the top of the basket. String your beads in the desired pattern. Instead of stringing the last bead in your pattern on the line (like the rest), tie a knot around the last bead (see photo below). Leave the fishing line long as you will need to eventually tie it to the bottom of the basket. (You could attached the beaded line directly to the bottom of the base, but that will case some issues if you need to adjust the beads due to spacing once they are all strung.)
6. // Allow the beaded line to hang, and move on to the next line. Repeat until you have gone all the way around the basket. Note - this may take a bit of trial and error to know exactly how many strands to hang and how to place them. Remember the top of the basket is larger than the bottom, so it shouldn't be over crowded. (In all, I had 36 strands evenly spaced.)
7. // Once you have completed the bead strands, it's time to tie them to the bottom of the basket. This may be a bit tedious, as there is not as much room on the bottom as there is on the top. Some of the beads may overlap, and that's ok. Snip any loose ends of line.
8. // Once the strands are arranged the way you would like them, take hot glue and put a small dab on the knots (on both the top and bottom of the basket) to secure the strands so they don't slip.
9. // Trim any excess line.
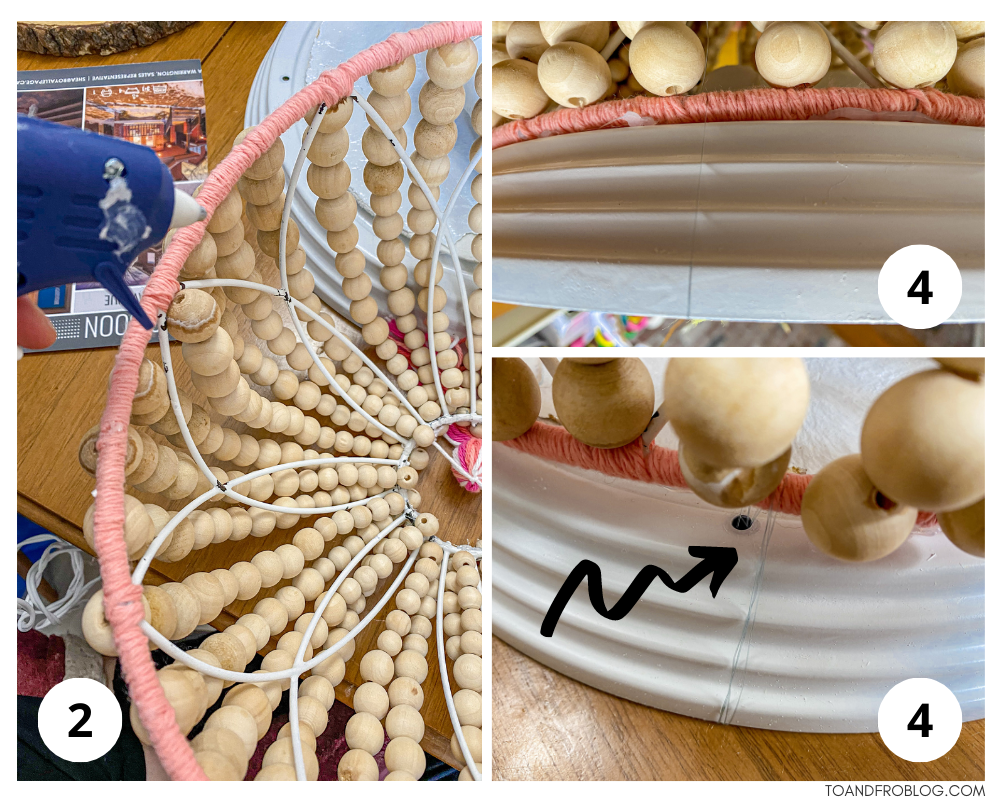
10. // Take your yarn colour of choice and wrap it around the top of the basket (see photo below). Be sure to cover any knots and line. Depending on the thickness of your yarn, you can do a couple of layers.
11. // If you wish, create a tassel using one or multiple colours of yarn to hang from the bottom of the basket. This step is option, but will help to add a little more colour to your chandelier.
12. // For the last step before installation, I went back and touched up the white paint on the basket with acrylic paint and a small paint brush, as some of it had chipped when I was tying the fishing line.
Now, your basket is complete! On to turning it into a chandelier that you can hang.
Hanging the Beaded Chandelier
*Keep in mind, this part of the process will vary depending on the existing light and/or what you will be using as the base (the part with the bulbs). After some trial and error (see 'Lessons Learned' below) this is how I ended up securing the basket to the base.
1. // Adjust your existing lighting as you need to. For us, it was removing the glass dome and eventually turning off the power supply, disconnecting the power supply and the wiring and removing the entire base from the ceiling (see why in "Lessons Learned" below). The existing base was a brown metal (very industrial looking), so I also painted it white using the same paint I had used for the basket.
2. // Apply hot glue to the top of the basket (in my case, where I wound the yarn). Remember, as the basket will be hanging, gravity will not be working in your favour. Be generous with the hot glue, but still try to keep it neat and tidy.
3. // Using gentle pressure, attach the top of the basket to the light base. Hold and allow to dry.
4. // Using fishing line, fasten the basket to the light base. You could also use yarn for a bit of colour, but I chose to use fishing line as it is clear. If needed, you could spray paint over the fishing line to cover it, but being clear, it will not be very noticeable.
5. // Reconnect the light to the ceiling. Turn on the power supply. Flick on the lights, take a step back and admire your latest DIY!
*Please note, we are not licensed electricians. Please seek professional help installing the light if you need it to ensure it is done safely and properly.
Total Number of Beads Used
- 36 strands x 15 beads per strand (4x 20mm, 5x 16mm, 6x 12mm)
- 20mm beads = 144
- 16mm beads = 180
- 12mm beads = 216
>> Total number of wooden beads: 540
Total Cost
- Wire hanging basket: $3 from Walmart
- Spray paint: $9 from Amazon
- Fishing line: $0
- Yarn: $0
- Wooden beads (package of 700 - 4 sizes) - $30.99 from Amazon x 2 bags = $61.98
- Hot glue and gun: $0
>> Total cost: approximately $74.00
* in Canadian dollars, pre-tax
** some items were $0 because I already had them at home
Lessons Learned
I started this project way back at the start of the pandemic in spring 2020. It's now winter 2021 and we're just getting it installed. Let's just say, a labour of love went into this piece. But, it was for the girls and I would do anything for them.
Looking back, making the beaded chandelier itself was not the difficult part. It really only took about a month to make, chipping away little by little each day when I had some free time (aka nap time). BUT it took 6 more months to install the completed piece because of a few technical difficulties. And by technical difficulties, meaning me not doing it right the first time. Or the three times after that.
While it did take some time (and sore fingers) to string all of the beads, I would say that was the easy part for me. The hardest part of this DIY was securing the light the existing flushmount base (from now on referred to as light base). It took a bit of trial and error to figure out how to get it attached. Our first road block was that the existing light base was not flat, and instead had small pieces of metal sticking out of it. We tried to hang it as is, and without removing from the ceiling, but the metal pieces got in the way and the basket would not sit flat.
I really hoped we wouldn't have to remove the fixture from the ceiling, but that was what happened after attempt number one (and what should have happened in the first place). When we disconnected the wiring and removed the base, it turns out the metal pieces were attached by screws on the underside and could be removed, meaning the base would now be flush! (I didn't take any photos of what I mean, but let's just say I wish I had figured that out from the start.)
With attempt number two came foam core and industrial velcro strips. I cut a ring out of the foam core, the size of the basket, and hot glued it to the basket. I then added velcro strips to the foam core and light base. I thought for sure this would work as the basket was not that heavy. And it worked, for about 15 minutes until it crashed to the floor.
Enter attempt three. I originally avoided gluing the basket directly to the light base as I was worried about removing lights bulbs should they burn out. However, during my attachment trials, I realized the the metal basket was big enough that I could easily stick my hand through the side and access the bulb to unscrew, remove and replace. So attempt three was to hot glue the entire base to the light base. BUT, wanting to ensure that this was the final attempt, I added some fishing line (the same stuff I had used to string the beads) for reinforcement. This involved disconnecting and moving the light for the final time. Using hot glue around the rim, I attached the basket to the light base. I then took some fishing line (because it is clear, but you could use similar coloured yarn if you wish) and wrapped it around the rim of the basket and the flush mount base (see photo). We then reattached the light to the ceiling.
Moral of the story? Remove the entire light from the ceiling the first time. And your best bet is to hot glue it to the base, with some adding fishing line AND if your hands are able to fit through the basket design to reach and remove the bulbs.
So yes, it took some love and some effort, but we eventually got it. I guess it just goes to show that not all DIY projects are perfectly executed, despite what you may see online.
Since moving into this house in August 2019, we've taken on quite a few DIY projects - from painting all of the old wooden trim and doors white, to painting a geometric mural in the girls' room, whitewashing our faux brick wall and adding a carpet runner to our main stairs. And while this DIY may have taken the longest to complete, it was by far cheaper and far more customized that buying one off the shelf. I'm pretty proud of this project, and I think it adds the perfect touch to the girls' pink and purple unicorn room.
Now, onto the next project! Let's just hope it doesn't take me 7 months to complete...
If you are interested in trying this for yourself and have questions, feel free to reach out on IG or by email.
Do you enjoy taking on DIYs? What is your favourite project that you've done? I'd love to hear!
*Disclosure: This post contains affiliate links. Purchasing products through these links helps to support the content To & Fro creates.


